With today’s article, we don’t want to write a complete guide to the Mail program on Mac but rather focus on some of its useful features. We have collected as many as 9 and once learned well … you can no longer do without it!
You will not want to use only the Mail client for Apple Mac for your work, guaranteed! Are you ready to manage, organize and work as best as you never thought you would?
Mail on Mac: The Default Program for Apple’s Email
If you use a fixed or portable PC (MacBook, Pro or Air) from Apple you will probably have used the native program to manage your email account at least once.
The latter is pre-installed by default in all versions of the OSX or macOS operating system and can be called up directly from the dock by clicking on its icon at the bottom right.
Now in version 12.2, with the release of Apple macOS Mojave the Mail app also benefited from some new improvements …
- Full integration with Siri (ask Siri to send an email, to reply to a contact or to look for a particular email message)
- Filters (a welcome change we will see later)
- Optimized and clearer conversations
- Simplified preferences
- Cards now working also in Mail (File – New Window)
What can we do with the mail program?
Trivially: sending and receiving e-mail messages.
But this is just the tip of the iceberg.
Mail in appearance appears to be a simple and immediate program. Poor in functions and icons.
But is not so!
Besides the simple sending and receiving of e-mails, the Apple client allows you to better organize (in an infinite number of ways) your mail archives, large or small.
Assign a color (markers – colored flags) to the individual emails for easy but above all quick consultation, dynamic smart folders for fast search of messages at different conditions, archive folders to quickly streamline incoming mail, personalized signatures and in html to depending on the account used and much more …
For you today we have selected the best 9 functions that you may not yet know. Here it is! (the last feature is really amazing!)
9 Tricks to Make the Best Apple Mail in OSX and macOS
Here we are! Today thanks to our guide, you will learn to organize and improve the management of the mail thanks to 9 incredible tricks that perhaps you didn’t know yet or you knew how to use not yet to the best!
Let’s start…
1 – How to Use New Implemented Filters on macOS Mail
With the introduction of the new Filters in Mail ( from the macOS Sierra version ) it is now possible to filter on the fly the e-mail messages present in a particular box according to a specific parameter.
Are you looking for a particular email containing an attachment? Or with a particular mark that you can’t remember the color of? Or do you only want to consult messages from contacts assigned to the VIP list?
Now it’s really easy to find them again. All you have to do is:
- Position yourself in the Inbox or in a specific box that you find in the list on the left (if you don’t see it it’s very likely to be hidden. Activate it immediately from the View menu – Show List Boxes)
- Click the Filter button at the top of the message list (in the middle of the program)
- Select the filter of your interest
- To return to all messages, click the button again
2 – How to Delete an Incorrect Proposed Mail Address with Auto Completion
It can happen that an e-mail address of one of your contacts to whom you usually write becomes obsolete or is modified.
The Mail program on the Mac however, with each new message created, will continue to always offer the wrong address.
To delete an old address no longer used by your contact or simply to make a general cleaning of your contacts (proposed by the auto completion) perform the following operations:
- Click on Window Menu
- Click on Recent Recipients
- Search and delete all unwanted or old contacts
PLEASE NOTE: The address will be deleted only from the contacts proposed during the creation of mail from the auto completion. The contact card will not be changed in any way.
3 – How to Backup All Mailboxes on your Mac (and where to find them)
Exporting or importing your mailboxes or individual messages has never been easier … or almost.
Mail offers a convenient method to perform a complete backup of all accounts or messages to be subsequently transferred to a new computer or laptop of the Apple or external hard drive.
No third-party software will be required to import or export your messages. Simply copy all the archives from the old Mac and paste them later in the same location then folder the new computer or laptop (after initializing the disk)
Let’s see how …
- Open a new Finder window
- Click on the Go Menu
- Go to the Folder
- Enter the command ~ / Library / Mail / and send
You are in your archive. True. It is not easy to navigate or understand but this trick will be very useful in case of problems with the mail or if the program cannot be opened. From here you can also open, read and copy the individual messages that OSX saves in .emlx format
4 – How to Enable and Display the CCN (Hidden Knowledge Copy) Hidden Default Field
Strange to say – but not too much – but the CCN field (hidden carbon copy) useful for hiding all the recipients is not shown by default in Mail.
To add or display the CCN field in the window for creating a new message, just run the procedure once to have it always active and visible:
- Create a new mail message
- Click on the View menu
- Check the Bcc Address Field entry
PLEASE NOTE: The CCN field is fundamental if you need to send a message to several recipients but you don’t want to show them to individual contacts.
The recipient who receives it will be able to read only one contact as the sender’s only address (see bonus)
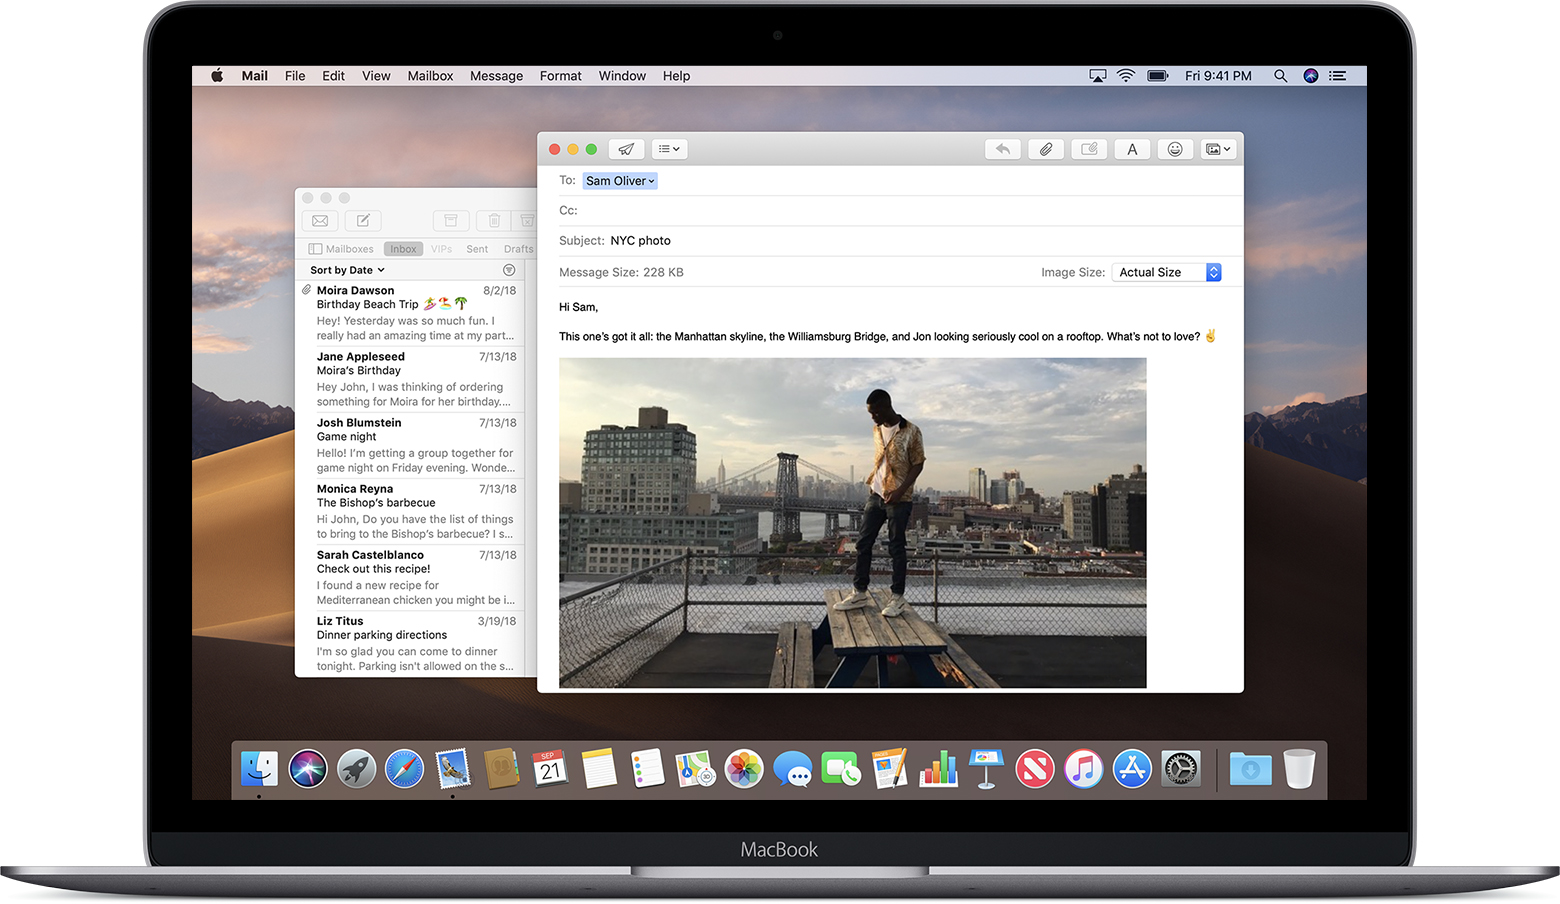
5 – How to Insert an Image into a Mail without Attaching It
Inserting an image into the body of an email message with Mail on Mac is really simple. They are usually added as an attachment but the effect that an image inserted in the body of a message gives is a different story!
The only care is to check before sending that the message body format is set in HTML or better in formatted text format.
If the content is in text only format, the images can be added only as an attachment.
- Create a new message
- Tile the image you want to insert
- Drag the image directly into the body
But it doesn’t end there.
You can also edit the photo, as you like. Have fun adding text, shapes, freehand drawing on the whole photo and much more. The limit as usual remains the fantasy …
6 – How to change the background of an email with a color
Assigning a background color is not as immediate as it may appear on Mail Mac.
The Format Bar does not display the background format as an option, but should be explicitly called from the menu.
You can choose a different background color for each message you want to send. To do it:
- Create a new one
- Click on Format Menu
- Click on Show Font
- Choose the background color from the appropriate button that you see highlighted in the photo
7 – How to Create a Personalized Signature in Html Format with Images, Logo or Hypertext Links
Inserting or creating a signature in Mac Mail in html format is child’s play!
You can customize your signature for every email account embellishing it with images, links, formatted text or company logo.
Now let’s see all the steps …
- Open the program
- Click up and left on Mail – Preferences (or faster with the cmd +, key combination )
- Click on the Signatures tab
- Highlight the email account for which you want to create a new signature
- Click the + button
- First assign the name to the new signature for your mails
- Start creating it on the right side
- To insert an image, a different background color or a link, call up the Fonts by Format menu – Show Fonts (without closing the signature editor!)
8 – How to Change the Name of the Marks in Mac Mail
A quick and very simple way to keep track of your messages is to mark them.
When you do this, a new box called Marked appears in the Favorites bar (on the left) with the ticks displayed inside it.
As you can see from the photo on the right, you just need to expand the boxes (click on the opening triangle next to it) to show the complete list of the markers present and the related messages divided by color.
In total Mail provides 7 different marks in the name (of a color)
It may not be the preferred choice of everyone to use this nomenclature to catalog their mails.
So how to rename a flag in Mail on Mac? Simple:
- From the list of boxes on the left expand the Marked box
- Click on a color name
- Type a new name
Simple right? You choose how to best define the various colored flags and organize your vast mail archive even better!
9 – How to Digitally Sign a PDF without Printing it with the Mac Directly from Mail
Oh yes, you read that right. Thanks to the powerful tools made available to us by Apple’s proprietary operating system, not only are we able to directly sign a pdf file locally and for free, but now, even from Mail !
View or create your digital signature on the pdf without having to leave your email program and insert it in a few simple clicks!
So how do you enter your digital signature in a pdf document that you need to send? We have prepared a video guide for you.
But first a few clarifications …
If you have a laptop, you already have everything you need. If, on the other hand, you want to perform the procedure from a fixed iMac, you will need to have an external trackpad.
But there is an alternative!
You will be able to photograph (capture) your signature through the webcam (iSight) of the computer. Such as?
- Open the pdf with the Preview program (if you haven’t modified anything, the pdf should open natively with this program)
- Show the Edit Toolbar by clicking on the “suitcase” icon at the top right
- Click on the Digital Signature icon
- Create Signature
- Select Camera
- Show the blank sheet previously signed on the webcam and wait for the acquisition of the latter
- Click on Finish
You have come to the end of our guide. You have learned to use the best tools made available by Mail and from today, you will be able to better manage your mail messages.
I recommend you remember to share the guide with all your colleagues, friends or acquaintances on the main social networks!